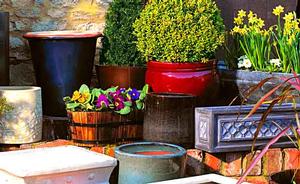
How to pot plants
Decorate your terrace, patio or balcony with a collection of colourful pots hosting a range of different plants.

You will need:
- Container
- Broken plant pot pieces
- Compost
- Plants
Time to complete job: Less than 1 hour
Approximate budget: £20
Container planting complements all types of gardens, from outside balconies on upper storey flats to the patios of large gardens.
Tips: Summer bedding plants should be planted when the risk of frost is over in your locality. If you have the time and space, try to plant them earlier and keep in a greenhouse for a few weeks. Leave them outside during warm periods and put them back inside the greenhouse at night.
Permanent plantings can be done at almost any time of the year - but it's better to do it in the spring when your plants will take better.
Inspirational plant potting ideas
Step 1: Preparation
If you're reusing an old pot or container, make sure it's cleaned thoroughly to remove all traces of soil from the inside to prevent carry-over of pests and diseases. Terracotta pots often develop green and white marks on the outside, but this can be cleaned off using mild detergent and a scourer.
If you want to be able to move your containers around the garden, go for lightweight materials such as resin, fibreglass or plastic. These have the added advantage of being frost proof in winter. They are also non-porous, so they don't absorb the moisture that your plants need in hot summer conditions.
Tip: As they are highly porous, soak clay or terracotta pots overnight before planting them up to retain as much moisture as possible.
Step 2: Fill the container
Ensure your container has sufficient drainage holes. To prevent these becoming blocked by compost, place curved pieces of broken plant pot or similar over the holes.
Don't fill pots with soil from the garden as it wont have the nutrients necessary for strong plant growth. It may also contain weed seeds, harmful insects and fungal diseases. Instead use a specially formulated compost for containers and hanging baskets.
Add the compost - if the container is very large and you are planting bedding then you can reduce the amount needed by adding large lumps of polystyrene packing material at the bottom. Do not do this with smaller containers or where the planting is dense.
Firm the compost lightly. Loam-based composts can be firmed more after planting, but take care not to over-compress loam-free composts.
Tip: Ensure there is a gap of 2.5cm (1in) at the top as a watering space when the container is finished.
Step 3: Plant up
Select good quality plants - start with good-looking well-rounded specimens and thoroughly soak by immersing in a bucket of water.
Arrange plants on top of the container to compose the best design.
Remove from pots. Ideally, the plant's roots should just reach the outside of the pot. This means they are not pot bound and are growing vigorously. If there is a dense rootball, tease larger roots apart to encourage them to grow into new compost.
Plant from the centre of the container outwards. Start by making a hole big enough for the rootball of the central plant. Lower the plant in, firming the compost to remove any large air gaps. Add the rest of the plants in similar fashion around the edges.
Level the surface of the compost and water thoroughly until water emerges from the base. Add a mulch of decorative gravel.
Tip: Use a similar size pot to make a hole and firm the compost around so you can drop in the plant when removed from its pot. All the plants should end up at the same depth as they were in their original containers.
These articles were originally published on the web on http://uktv.co.uk/home/stepbystep/aid/86 however it was no longer on-line as at February 2017. The copyright is with the original owners and the article is reproduced here as it is informative.