Patio Furniture
A Great Weekend Project
(originally on hometime.com
 Homemade patio furniture is an excellent weekend project to complement a deck or patio. With a good set of instructions, a few basic power tools, and a little know-how, the results can be outstanding.
For this project, we selected the classic Adirondack style patio furniture founded in the resorts and lodges of the Adirondack Mountains. What makes this style unique - particularly the chairs - are the rounded backrest, wide armrests, slatted seat and angled supports that give it a reclined look.
 Also, we decided to use cedar, but pine is also commonly used for outdoor furniture. It weathers faster than redwood or cedar. But if you're painting the chair, pine is also a good choice.
Building Adirondack furniture involves some special angle cuts, so a detailed plan really plays a key part in getting good results. Our furniture plans came from Wood® Magazine and we've listed how to order the plans at the end of this project.
Making Adirondack Chairs
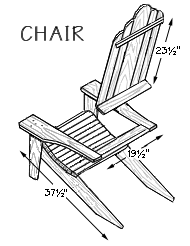 You'll probably want to build two chairs to make a set, so duplicate steps for the second chair when making the first.
Begin by cutting all the 1x boards (various widths) to length. Then rip cut them to width according to your plan. To keep track of each piece, label them with a pencil (i.e. "B" for back boards).
The back boards are called splats. Slide them together and using a compass, mark a half circle on the boards. Our plan called for a radius 3 1/2" from the side with a 2 15/16" radius on each end board. Cut the outside edge of the marks with a jig saw then sand them down smooth to the pencil mark.
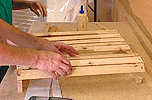 Angle cut the front slats of the seat to wrap around the front edge. Also, angle cut the cross piece that supports the splats in back. Saw the rounded slat supports and assemble the seat section.
Saw the armrests according to the plan's full-sized pattern. We tacked them together and cut both armrest boards at the same time.
Next, mark the lap joints for the armrests and middle back support. Cut them perfectly square so the ends of the armrests overlap the ends of the support. Pre-drill, glue and fasten the armrests to the support. We countersank the holes with a Forstner bit so we could later plug them.
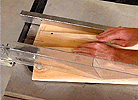 Cut out the back legs that support the slats. These cuts are a bit tricky. Each leg is narrow at the bottom and wide at the top, and both ends are mitered cut. We made two chairs, so we made a jig to guide the cuts through the saw so all the legs would be the same.
Saw the front legs and the pie-shaped armrest supports. Mark and pre-drill screw holes through the legs and seat supports. We also used another jig to space the holes. Then fasten the legs to the slat supports.
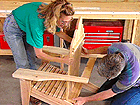 Glue and screw the splats to their upper and lower cross member supports. Gap the splats on the lower support and a scrap piece the same height, then fasten the splats to the support. Flip the unit over and clamp the upper support in place. Again, flip the unit over, gap the splats and fasten the upper support.
Fasten the armrest assembly to the front legs, set the splat unit on its support (angling the bottom in without stressing the glued joints) and fasten them together in back.
Fabricating An Adirondack Footstool
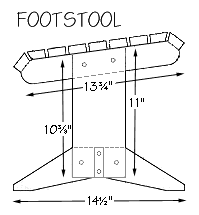 The plan for our Adirondack footstool included an angled top that accentuated the slope of the chairs and boomerang-shaped feet that made it a pretty sturdy unit. Because it was fairly small and easy to handle, we assembled the piece on a level workbench surface to help get all the joints lined up properly.
Cut the footstool supports and legs to length and width (cut the slats later). Label them with a pencil to keep track of where they go.
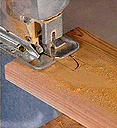 Notch the two legs at the bottom to fit snugly over the stretcher (cross brace). Mark out the notch according to the dimensions of the plan and cut them out with a jigsaw. If the joints are too tight, sand them to fit.
Miter cut the tops of the legs 8° so the top of the rest will slope slightly. Tap the mitered legs onto the stretcher. Attach the boomerang-shaped feet on each leg.
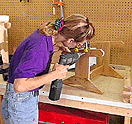 Screw the side rails to the outside edge of each leg, making sure they're flush with the legs' mitered tops. Once the sides are on, measure across them to get the slat distances and cut those to length.
Fit the slats over the rails and gap them accordingly. Pre-drill holes in the centers, then glue and screw them in place.
Building An Adirondack Side Table
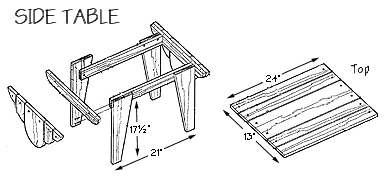
The Adirondack table plan we had called for side and end rails holding the tabletop. The angled legs and rounded table ends are designed just like the features of the chair.
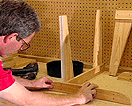 Angle cut the legs narrow at the bottom and wide at the top. You can mark out each board and cut along the angled lines, but we ran them through the saw guided on a wood jig. That made all four legs identical.
Cut the side rails to length and width. Then glue, clamp and screw the legs along the ends of the side rails. Use a tri-square to flush the joints.
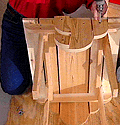 Cut out the end rails and attach them to the legs. The ends are rounded off and support the rounded ends of the tabletop.
Mark out the radius for each end splat. Cut them with a jig saw on the outside edge of the mark and sand them down to the mark.
Set the tabletop splats, glue and fasten them in place. Our plan called for five pieces spaced about 1/4" apart that overhang 3/4" on each side to cover the tops of the end pieces.
Plugging & Finishing
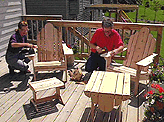 Once the furniture is assembled, it needs to be sanded smooth and sealed -- either by paint, stain or some clear coat finish. Yet, prior to sanding and finishing, the countersunk screws and their holes should be plugged to prevent water from entering the wood. The plugs also give the furniture a professionally-built look.
We used a plug cutter attachment on the drill press and cut about 200 plugs from cedar stock to match our furniture. But if you're not too concerned with matching the furniture's wood, lumber yards and how-to centers often carry a variety of pre-cut plugs.
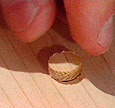 Dab some glue on the plugs and set them in place, making sure the plug grain lines up with the piece. Tap the plugs snugly in place. After installing the plugs, lightly sand the entire piece. Feel across the plugs and sand down any that stick up too high.
Prime the furniture and paint it with an exterior enamel. Paint is the traditional finish for this style of chair and we selected forest green to give the whole set a resort flavor. However, you may instead want to stain your chair after the wood has had a chance to dry out.
Painting the slats can be a bit tedious, but you want good coverage between them. Use a small brush to paint the tight spots. Also, be sure to paint the bottoms of the legs because moisture can easily wick into the wood if it's not protected there.