PaverTable Plans
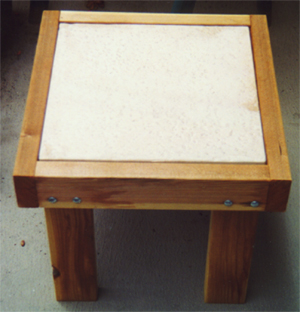
These plans show how to create an functional and distinctive small patio table utilizing simple and common tools.
This is a relatively simple and quick table to construct.
Required Tools
- Electric Drill/Driver Or Cordless ( I favor a Makita 9.6v)
- Drill Bits/Screwdriver Bit
- Wood Hand saw
- 1/2" Socket & Ratchet or Wrench
- Hammer
Required Materials
- 2 - 2'x4'x6' redwood
- 1 - paver approx. 16"x16"x1 1/2"
- 4 - 1/4" x 3 1/2" carriage bolts
- 8 - 1/4" nuts
- 8 - 1/4" washers
- 8 - 3" deck screws
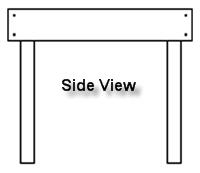
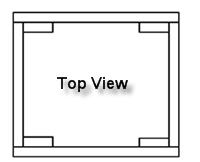
General Plans
Instructions
Utilizing the 2x4's, cut the following pieces;
6@ 16" == Leg pieces/2 top side pieces
2@ 19" == 2 top side pieces
Constructing the top of the table
Take two of the 16 inch 2x4's and the two 19" 2x4 pieces, and form a square. See Figure 1.
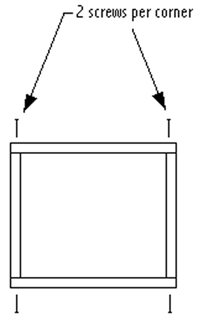
Figure 1 Paver Table top construction
Pre-drill two holes per corner, and attach utilizing the three inch deck screws. See figure 1. Now place the constructed square top piece on a flat level surface. Take the paver and place it upside down and inside the constructed square. Now take a 19 inch leg piece and place it in one corner, flush to the corner and bottom of the paver stone, See Figure 2.
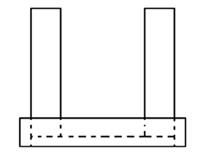
Figure 2 Attaching the legs
While holding each leg in place, drill two holes, using a 1/4" drill bit, approximately one and a half inches apart. Place a 1/4" x 3 1/3" carriage bolt through each hole, note - it may be necessary to use a hammer to tap the carriage bolt through the drilled holes, and to seat the carriage bolt head into the wood. Next, place a washer then attach and tighten the nut. You have already completed the majority of the labor in completing this project!
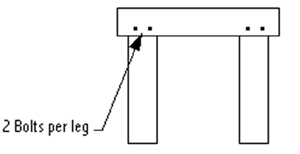
Figure 3 Bolting the leg pieces
Once all four legs have been attached, flip the constructed unit onto its feet. Take the paver and gently place it down into the table top, it should rest on the top of the legs, and be inset just enough to assure a level table top.
Congratulations!
You now are the proud owner of a low cost, very nice, and functional patio table that will endure any task. Created from easily attainable materials, this little table is unique looking, and unique in materials used to build it. Many interesting and functional items can be constructed using materials made and sold specifically for one use (such as the paver stone in these plans). It is fun to try and create a functional item using theses non conventional materials. I hope your project ended successfully, and hope the paver table comes in handy in your outback sitting.
Copyright 2004 © Couts-Gould Designs